
Construction method/procedure

From construction to finishing touches, easily resolved with DIY!

Charcoal Ondol DIY Installation Video

Following K-pop and K-culture, the world’s attention is now on K-heating. This innovative heating system, which combines the benefits of both wet and dry heating using Korea’s healthy ondol technology, is transforming the lives of people worldwide.

1. Cleaning the surroundings and installing insulation sheets

  • Site measurement and installation plan development
  • Checking the smoothness of the floor surface and preparing for any defects after installation
  • Cleaning the floor surface to ensure there are no foreign substances
  • Installing insulation sheets on the floor surface (with the aluminum side facing upwards)

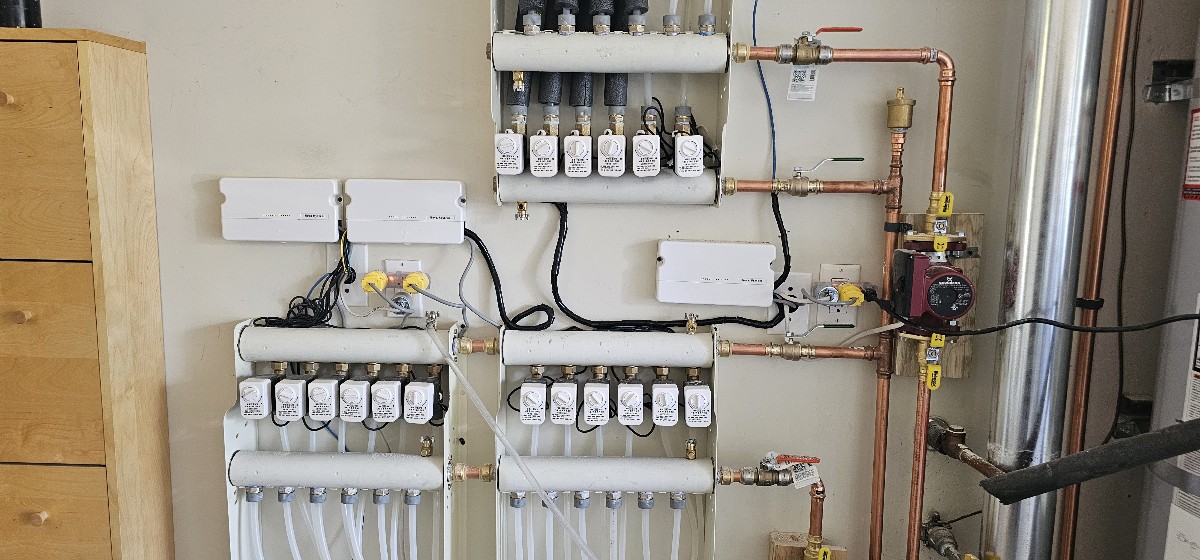
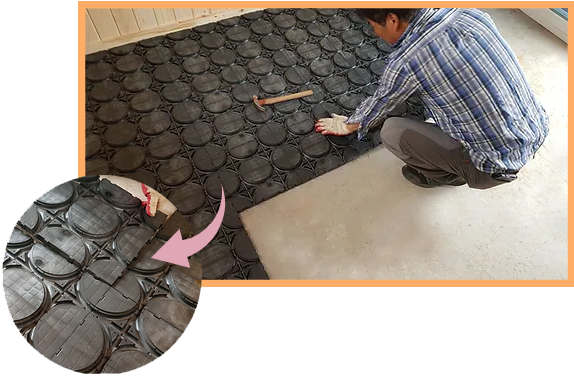
※ Preparing materials in advance and determining the quantity of distribution outlets

2.Installation of the lower part of the charcoal ondol

  • Installing the terminals first at the front according to the installation area.
  • Based on the installation plan, start with the installation of the lower part.
  • When connecting the lower part, aligning from both corners makes it easier.

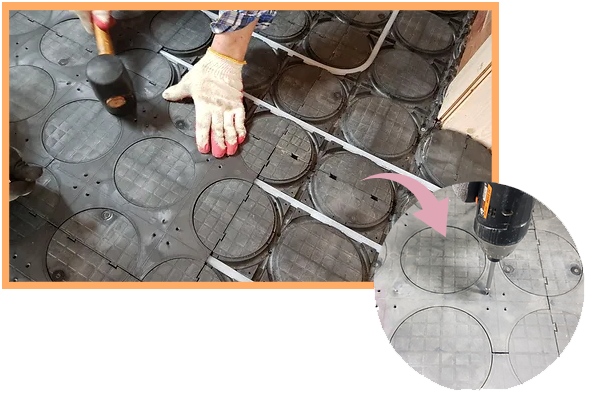
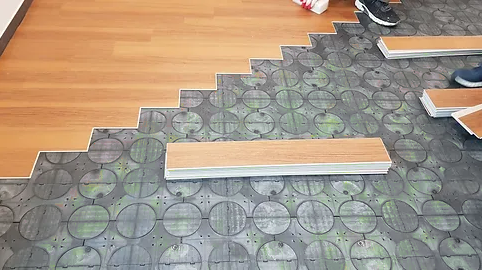
※ If there is extra space, cut and fill the charcoal ondol panels accordingly (refer to the video).

3. Installation of heating pipes

  • Plan a balanced distribution based on the estimated heating area, ensuring that each unit covers no more than 13 square meters and a length of 90 meters.
  • Start installation from the closest point and proceed outward.
  • Exercise caution to prevent bends in the pipes, especially in curved sections.

※ Heating pipes are made of XL or PE-RT with an inner diameter of 9mm and an outer diameter of 12mm.

4. Organizing the pipes in front of the distribution unit

  • If the installation of the heating pipes is completed before the distribution unit (boiler) installation, trim and organize the pipe lengths in preparation.

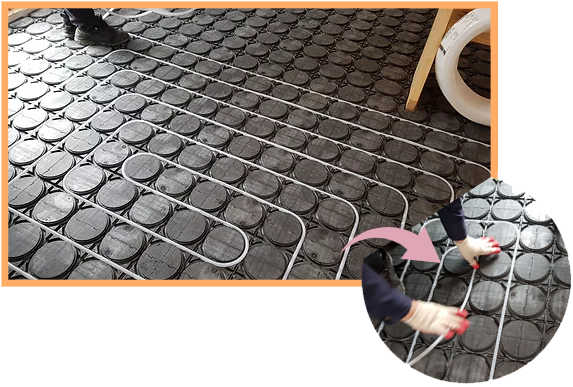
※(At this time, distinguish between inlet and outlet sets to avoid confusion.)

5. Installation of the upper part of the charcoal ondol

  • Installing the upper part with a gap covering the junction of the lower part in a rectangular shape adds extra sturdiness.
  • After installing the upper part, adjust it according to the floor smoothness.

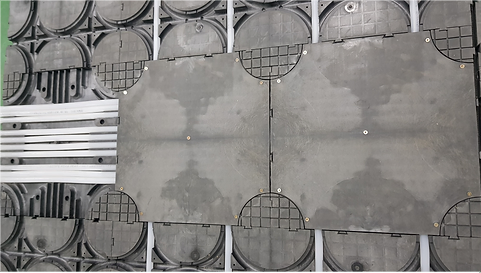
※ If there is any uplift, secure the upper part with screws or bolts.

6. Connecting the distribution unit (boiler)

  • Prepare valve sockets (couplings) to connect the 9¢ heating pipes securely.
  • Connect the heating pipes preferably in a vertical orientation.
  • When dividing the heating space, use a double-line distribution socket for one unit.
  • Use corrosion-resistant materials such as stainless steel or plastic for the distribution unit and components.

7. Installation of finishing materials for the charcoal ondol

  • Charcoal ondol allows freedom in the choice of finishing materials, so you can select the finishing materials according to your preference.
  • Before installing the floor finishing materials, it’s advisable to conduct a test run of the boiler to identify any issues.